Bootstrap Form Field
Intro
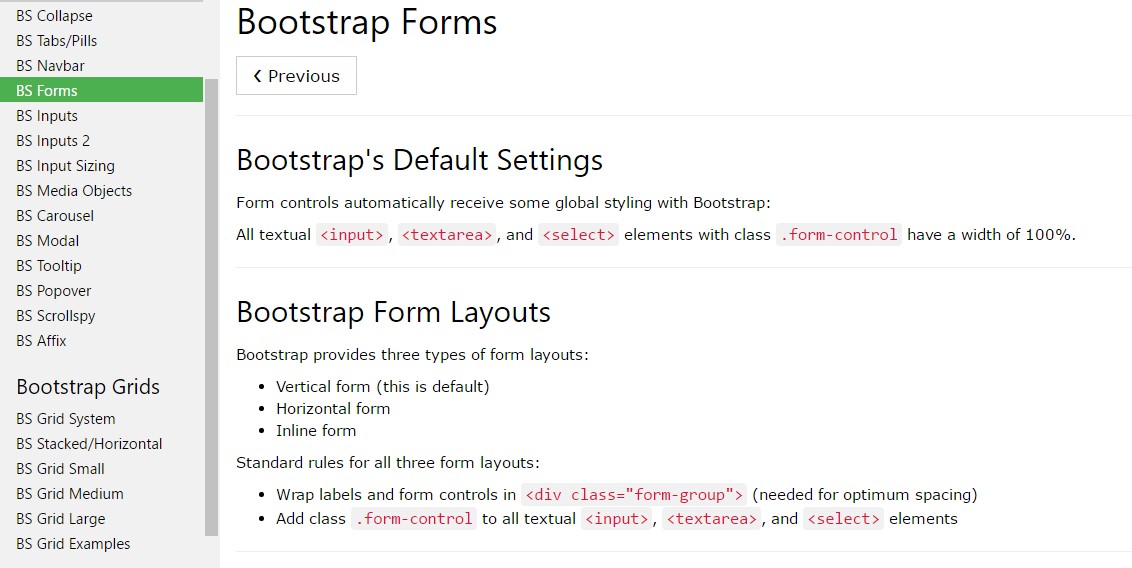
Bootstrap grants various form manage appearances, layout features, and also custom made elements for producing a vast range of Bootstrap Form Button.
Forms supply the most ideal treatment for having some suggestions coming from the website visitors of our web pages. If it is definitely a straightforward connection or else subscription form having simply a couple of areas or else a sophisticated and effectively thought examination the Bootstrap 4 framework got everything that is actually demanded to execute the work and have fantastic responsive appearance.
By default within the Bootstrap framework the form features are designated to span the entire size of its parent element-- this gets accomplished by committing the
.form-control.form-groupBootstrap Form Inline directions
Bootstrap's form controls grow with regards to our Rebooted form designs along with classes.
Work with these kinds of classes to opt right into their modified screens for a additional constant rendering across web browsers and gadgets . The representation form listed here demonstrates basic HTML form elements that acquire up-dated styles from Bootstrap together with more classes.
Take note, ever since Bootstrap utilizes the HTML5 doctype, all types of inputs must provide a
type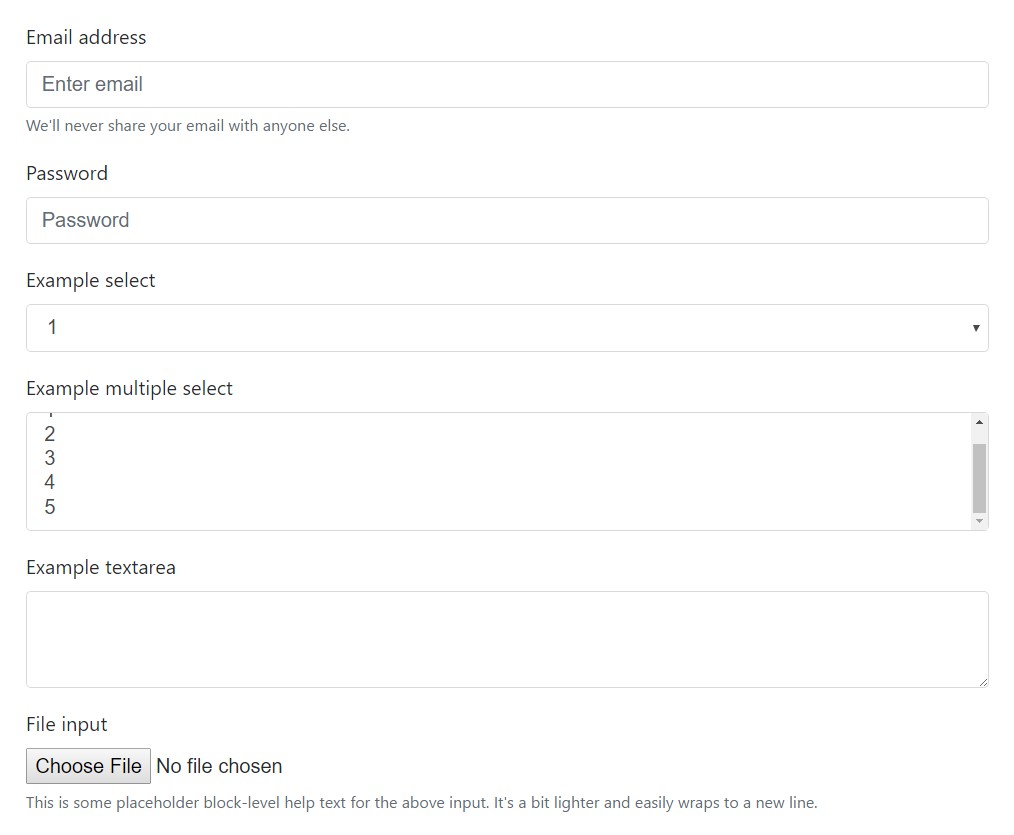
<form>
<div class="form-group">
<label for="exampleInputEmail1">Email address</label>
<input type="email" class="form-control" id="exampleInputEmail1" aria-describedby="emailHelp" placeholder="Enter email">
<small id="emailHelp" class="form-text text-muted">We'll never share your email with anyone else.</small>
</div>
<div class="form-group">
<label for="exampleInputPassword1">Password</label>
<input type="password" class="form-control" id="exampleInputPassword1" placeholder="Password">
</div>
<div class="form-group">
<label for="exampleSelect1">Example select</label>
<select class="form-control" id="exampleSelect1">
<option>1</option>
<option>2</option>
<option>3</option>
<option>4</option>
<option>5</option>
</select>
</div>
<div class="form-group">
<label for="exampleSelect2">Example multiple select</label>
<select multiple class="form-control" id="exampleSelect2">
<option>1</option>
<option>2</option>
<option>3</option>
<option>4</option>
<option>5</option>
</select>
</div>
<div class="form-group">
<label for="exampleTextarea">Example textarea</label>
<textarea class="form-control" id="exampleTextarea" rows="3"></textarea>
</div>
<div class="form-group">
<label for="exampleInputFile">File input</label>
<input type="file" class="form-control-file" id="exampleInputFile" aria-describedby="fileHelp">
<small id="fileHelp" class="form-text text-muted">This is some placeholder block-level help text for the above input. It's a bit lighter and easily wraps to a new line.</small>
</div>
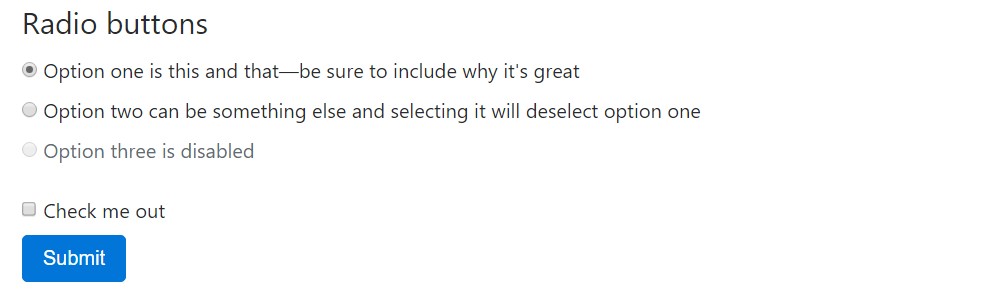
<fieldset class="form-group">
<legend>Radio buttons</legend>
<div class="form-check">
<label class="form-check-label">
<input type="radio" class="form-check-input" name="optionsRadios" id="optionsRadios1" value="option1" checked>
Option one is this and that—be sure to include why it's great
</label>
</div>
<div class="form-check">
<label class="form-check-label">
<input type="radio" class="form-check-input" name="optionsRadios" id="optionsRadios2" value="option2">
Option two can be something else and selecting it will deselect option one
</label>
</div>
<div class="form-check disabled">
<label class="form-check-label">
<input type="radio" class="form-check-input" name="optionsRadios" id="optionsRadios3" value="option3" disabled>
Option three is disabled
</label>
</div>
</fieldset>
<div class="form-check">
<label class="form-check-label">
<input type="checkbox" class="form-check-input">
Check me out
</label>
</div>
<button type="submit" class="btn btn-primary">Submit</button>
</form>Shown below is a finished selection of the specified Bootstrap Form Button regulations sustained by Bootstrap together with the classes which customize them. Supplementary documents is offered for every group.
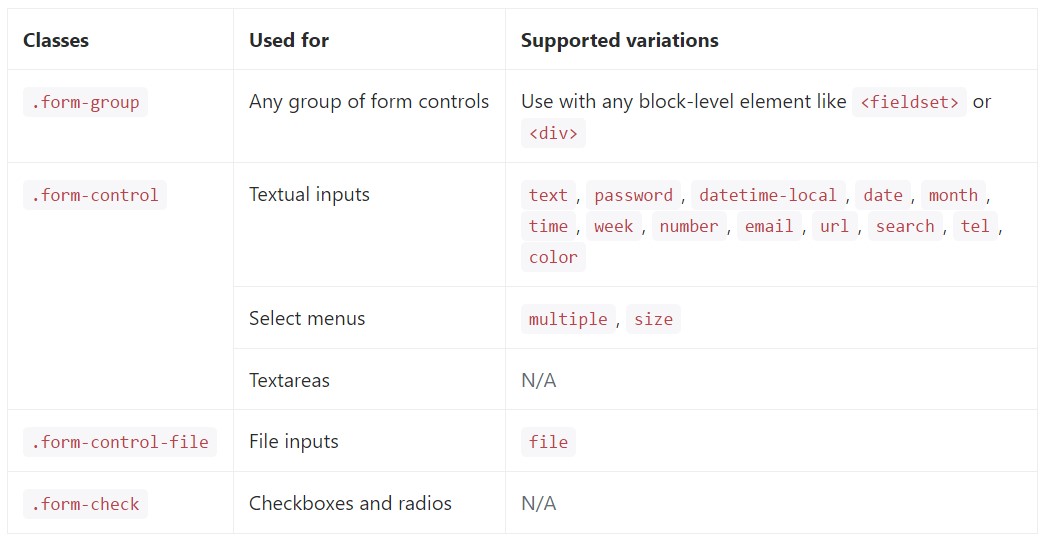
Textual inputs
Listed here are the illustrations of
.form-control<input>type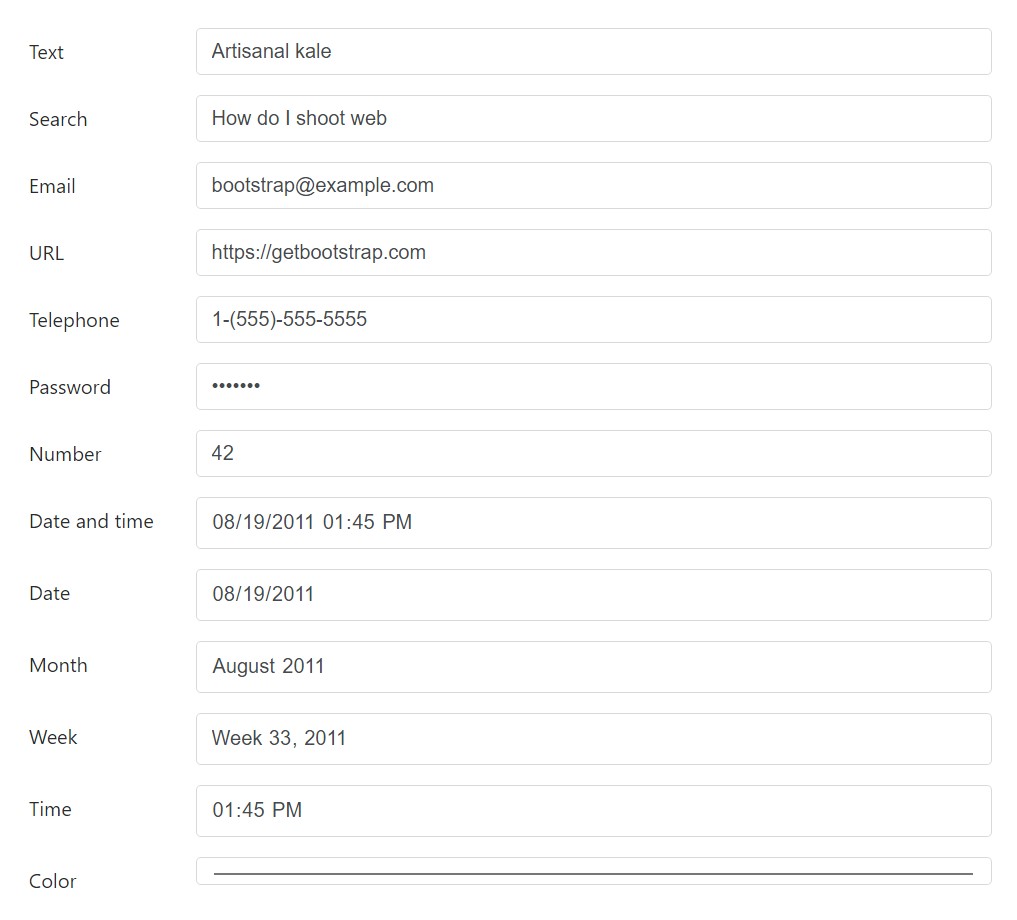
<div class="form-group row">
  <label for="example-text-input" class="col-2 col-form-label">Text</label>
  <div class="col-10">
    <input class="form-control" type="text" value="Artisanal kale" id="example-text-input">
  </div>
</div>
<div class="form-group row">
  <label for="example-search-input" class="col-2 col-form-label">Search</label>
  <div class="col-10">
    <input class="form-control" type="search" value="How do I shoot web" id="example-search-input">
  </div>
</div>
<div class="form-group row">
  <label for="example-email-input" class="col-2 col-form-label">Email</label>
  <div class="col-10">
    <input class="form-control" type="email" value="bootstrap@example.com" id="example-email-input">
  </div>
</div>
<div class="form-group row">
  <label for="example-url-input" class="col-2 col-form-label">URL</label>
  <div class="col-10">
    <input class="form-control" type="url" value="https://getbootstrap.com" id="example-url-input">
  </div>
</div>
<div class="form-group row">
  <label for="example-tel-input" class="col-2 col-form-label">Telephone</label>
  <div class="col-10">
    <input class="form-control" type="tel" value="1-(555)-555-5555" id="example-tel-input">
  </div>
</div>
<div class="form-group row">
  <label for="example-password-input" class="col-2 col-form-label">Password</label>
  <div class="col-10">
    <input class="form-control" type="password" value="hunter2" id="example-password-input">
  </div>
</div>
<div class="form-group row">
  <label for="example-number-input" class="col-2 col-form-label">Number</label>
  <div class="col-10">
    <input class="form-control" type="number" value="42" id="example-number-input">
  </div>
</div>
<div class="form-group row">
  <label for="example-datetime-local-input" class="col-2 col-form-label">Date and time</label>
  <div class="col-10">
    <input class="form-control" type="datetime-local" value="2011-08-19T13:45:00" id="example-datetime-local-input">
  </div>
</div>
<div class="form-group row">
  <label for="example-date-input" class="col-2 col-form-label">Date</label>
  <div class="col-10">
    <input class="form-control" type="date" value="2011-08-19" id="example-date-input">
  </div>
</div>
<div class="form-group row">
  <label for="example-month-input" class="col-2 col-form-label">Month</label>
  <div class="col-10">
    <input class="form-control" type="month" value="2011-08" id="example-month-input">
  </div>
</div>
<div class="form-group row">
  <label for="example-week-input" class="col-2 col-form-label">Week</label>
  <div class="col-10">
    <input class="form-control" type="week" value="2011-W33" id="example-week-input">
  </div>
</div>
<div class="form-group row">
  <label for="example-time-input" class="col-2 col-form-label">Time</label>
  <div class="col-10">
    <input class="form-control" type="time" value="13:45:00" id="example-time-input">
  </div>
</div>
<div class="form-group row">
  <label for="example-color-input" class="col-2 col-form-label">Color</label>
  <div class="col-10">
    <input class="form-control" type="color" value="#563d7c" id="example-color-input">
  </div>
</div>
Form designs
Due to the fact that Bootstrap utilizes
display: blockwidth :100%Form groups
The
.form-groupmargin-bottom<fieldset><div>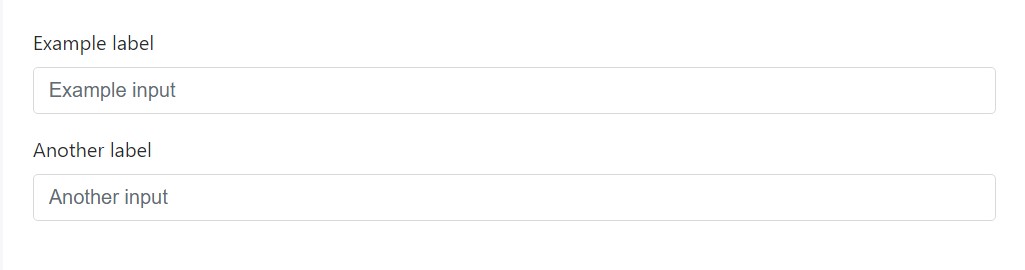
<form>
  <div class="form-group">
    <label for="formGroupExampleInput">Example label</label>
    <input type="text" class="form-control" id="formGroupExampleInput" placeholder="Example input">
  </div>
  <div class="form-group">
    <label for="formGroupExampleInput2">Another label</label>
    <input type="text" class="form-control" id="formGroupExampleInput2" placeholder="Another input">
  </div>
</form>
Inline forms
Make use of the
.form-inline- Controls are
display: flex- Controls and input groups are given
width: autowidth: 100%- Controls exclusively show up inline within viewports which are at least 576px big to represent thin viewports on mobile devices.
You may likely require to personally fix the size and placement of individual form controls together with spacing utilities (as demonstrated below) And lastly, be sure to always include a
<label>
<form class="form-inline">
  <label class="sr-only" for="inlineFormInput">Name</label>
  <input type="text" class="form-control mb-2 mr-sm-2 mb-sm-0" id="inlineFormInput" placeholder="Jane Doe">

  <label class="sr-only" for="inlineFormInputGroup">Username</label>
  <div class="input-group mb-2 mr-sm-2 mb-sm-0">
    <div class="input-group-addon">@</div>
    <input type="text" class="form-control" id="inlineFormInputGroup" placeholder="Username">
  </div>

  <div class="form-check mb-2 mr-sm-2 mb-sm-0">
    <label class="form-check-label">
      <input class="form-check-input" type="checkbox"> Remember me
    </label>
  </div>

  <button type="submit" class="btn btn-primary">Submit</button>
</form>
Customized form controls plus picks are as well supported.

<form class="form-inline">
  <label class="mr-sm-2" for="inlineFormCustomSelect">Preference</label>
  <select class="custom-select mb-2 mr-sm-2 mb-sm-0" id="inlineFormCustomSelect">
    <option selected>Choose...</option>
    <option value="1">One</option>
    <option value="2">Two</option>
    <option value="3">Three</option>
  </select>

  <label class="custom-control custom-checkbox mb-2 mr-sm-2 mb-sm-0">
    <input type="checkbox" class="custom-control-input">
    <span class="custom-control-indicator"></span>
    <span class="custom-control-description">Remember my preference</span>
  </label>

  <button type="submit" class="btn btn-primary">Submit</button>
</form>
Alternatives to covered up labels
Assistive technological innovations such as screen readers will definitely have difficulty by using your forms in case you do not incorporate a label for every single input. For these particular inline forms, you have the ability to conceal the labels applying the
.sr-onlyaria-labelaria-labelledbytitleplaceholderplaceholderUsing the Grid
For even more organised form layouts that are also responsive, you can certainly incorporate Bootstrap's predefined grid classes or mixins to create horizontal forms. Include the
.row.col-*-*Be sure to add
.col-form-label<label><legend>.col-form-legend<label>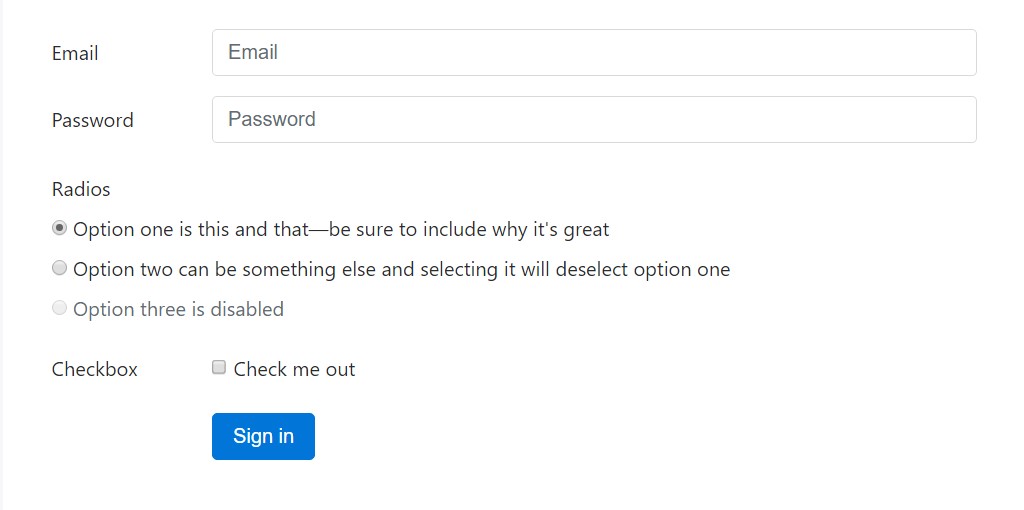
<div class="container">
  <form>
    <div class="form-group row">
      <label for="inputEmail3" class="col-sm-2 col-form-label">Email</label>
      <div class="col-sm-10">
        <input type="email" class="form-control" id="inputEmail3" placeholder="Email">
      </div>
    </div>
    <div class="form-group row">
      <label for="inputPassword3" class="col-sm-2 col-form-label">Password</label>
      <div class="col-sm-10">
        <input type="password" class="form-control" id="inputPassword3" placeholder="Password">
      </div>
    </div>
    <fieldset class="form-group row">
      <legend class="col-form-legend col-sm-2">Radios</legend>
      <div class="col-sm-10">
        <div class="form-check">
          <label class="form-check-label">
            <input class="form-check-input" type="radio" name="gridRadios" id="gridRadios1" value="option1" checked>
            Option one is this and that—be sure to include why it's great
          </label>
        </div>
        <div class="form-check">
          <label class="form-check-label">
            <input class="form-check-input" type="radio" name="gridRadios" id="gridRadios2" value="option2">
            Option two can be something else and selecting it will deselect option one
          </label>
        </div>
        <div class="form-check disabled">
          <label class="form-check-label">
            <input class="form-check-input" type="radio" name="gridRadios" id="gridRadios3" value="option3" disabled>
            Option three is disabled
          </label>
        </div>
      </div>
    </fieldset>
    <div class="form-group row">
      <label class="col-sm-2">Checkbox</label>
      <div class="col-sm-10">
        <div class="form-check">
          <label class="form-check-label">
            <input class="form-check-input" type="checkbox"> Check me out
          </label>
        </div>
      </div>
    </div>
    <div class="form-group row">
      <div class="offset-sm-2 col-sm-10">
        <button type="submit" class="btn btn-primary">Sign in</button>
      </div>
    </div>
  </form>
</div>
Grid-based form design and styles as well maintain big and compact inputs.

<div class="container">
  <form>
    <div class="form-group row">
      <label for="lgFormGroupInput" class="col-sm-2 col-form-label col-form-label-lg">Email</label>
      <div class="col-sm-10">
        <input type="email" class="form-control form-control-lg" id="lgFormGroupInput" placeholder="you@example.com">
      </div>
    </div>
    <div class="form-group row">
      <label for="smFormGroupInput" class="col-sm-2 col-form-label col-form-label-sm">Email</label>
      <div class="col-sm-10">
        <input type="email" class="form-control form-control-sm" id="smFormGroupInput" placeholder="you@example.com">
      </div>
    </div>
  </form>
</div>
Checkboxes and radios
Default radios and checkboxes are developed upon with the support of
.form-checkThe disabled class will at the same time lighten the message color tone to help signify the input's state.
Each and every checkbox and radio is wrapped in a
<label>- It gives a greater hit areas for checking the control.
- It supplies a semantic and helpful wrapper to assist us substitute the default
<input>- It activates the state of the
<input>We conceal the default
<input>opacity.custom-control-indicator<input>contentWe apply the relative selector
~<input>: checked.custom-control-description<input>In the checked states, we use base64 embedded SVG icons from Open Iconic. This provides us the best control for styling and positioning across browsers and devices.
Checkboxes

<label class="custom-control custom-checkbox">
  <input type="checkbox" class="custom-control-input">
  <span class="custom-control-indicator"></span>
  <span class="custom-control-description">Check this custom checkbox</span>
</label>
Custom checkboxes are able to additionally apply the
: indeterminate
In case you're using jQuery, something like this should really suffice:
$('.your-checkbox').prop('indeterminate', true)Radios

<label class="custom-control custom-radio">
  <input id="radio1" name="radio" type="radio" class="custom-control-input">
  <span class="custom-control-indicator"></span>
  <span class="custom-control-description">Toggle this custom radio</span>
</label>
<label class="custom-control custom-radio">
  <input id="radio2" name="radio" type="radio" class="custom-control-input">
  <span class="custom-control-indicator"></span>
  <span class="custom-control-description">Or toggle this other custom radio</span>
</label>
Default (stacked)
By default, any variety of checkboxes and radios that are really close relative will be vertically piled as well as effectively spaced using
.form-check
<div class="form-check">
  <label class="form-check-label">
    <input class="form-check-input" type="checkbox" value="">
    Option one is this and that—be sure to include why it's great
  </label>
</div>
<div class="form-check disabled">
  <label class="form-check-label">
    <input class="form-check-input" type="checkbox" value="" disabled>
    Option two is disabled
  </label>
</div>
<div class="form-check">
  <label class="form-check-label">
    <input class="form-check-input" type="radio" name="exampleRadios" id="exampleRadios1" value="option1" checked>
    Option one is this and that—be sure to include why it's great
  </label>
</div>
<div class="form-check">
  <label class="form-check-label">
    <input class="form-check-input" type="radio" name="exampleRadios" id="exampleRadios2" value="option2">
    Option two can be something else and selecting it will deselect option one
  </label>
</div>
<div class="form-check disabled">
  <label class="form-check-label">
    <input class="form-check-input" type="radio" name="exampleRadios" id="exampleRadios3" value="option3" disabled>
    Option three is disabled
  </label>
</div>
Inline
Group checkboxes as well as radios on the similar horizontal row with incorporating
.form-check-inline.form-check
<div class="form-check form-check-inline">
  <label class="form-check-label">
    <input class="form-check-input" type="checkbox" id="inlineCheckbox1" value="option1"> 1
  </label>
</div>
<div class="form-check form-check-inline">
  <label class="form-check-label">
    <input class="form-check-input" type="checkbox" id="inlineCheckbox2" value="option2"> 2
  </label>
</div>
<div class="form-check form-check-inline disabled">
  <label class="form-check-label">
    <input class="form-check-input" type="checkbox" id="inlineCheckbox3" value="option3" disabled> 3
  </label>
</div>
<div class="form-check form-check-inline">
  <label class="form-check-label">
    <input class="form-check-input" type="radio" name="inlineRadioOptions" id="inlineRadio1" value="option1"> 1
  </label>
</div>
<div class="form-check form-check-inline">
  <label class="form-check-label">
    <input class="form-check-input" type="radio" name="inlineRadioOptions" id="inlineRadio2" value="option2"> 2
  </label>
</div>
<div class="form-check form-check-inline disabled">
  <label class="form-check-label">
    <input class="form-check-input" type="radio" name="inlineRadioOptions" id="inlineRadio3" value="option3" disabled> 3
  </label>
</div>
Without labels
You really should not have a text message within the
<label>aria-label
<div class="form-check">
  <label class="form-check-label">
    <input class="form-check-input" type="checkbox" id="blankCheckbox" value="option1" aria-label="...">
  </label>
</div>
<div class="form-check">
  <label class="form-check-label">
    <input class="form-check-input" type="radio" name="blankRadio" id="blankRadio1" value="option1" aria-label="...">
  </label>
</div>
Static commands
If you need to set plain message alongside a form label within a form, use the
.form-control-static
<form>
  <div class="form-group row">
    <label class="col-sm-2 col-form-label">Email</label>
    <div class="col-sm-10">
      <p class="form-control-static">email@example.com</p>
    </div>
  </div>
  <div class="form-group row">
    <label for="inputPassword" class="col-sm-2 col-form-label">Password</label>
    <div class="col-sm-10">
      <input type="password" class="form-control" id="inputPassword" placeholder="Password">
    </div>
  </div>
</form>
<form class="form-inline">
  <div class="form-group">
    <label class="sr-only">Email</label>
    <p class="form-control-static">email@example.com</p>
  </div>
  <div class="form-group mx-sm-3">
    <label for="inputPassword2" class="sr-only">Password</label>
    <input type="password" class="form-control" id="inputPassword2" placeholder="Password">
  </div>
  <button type="submit" class="btn btn-primary">Confirm identity</button>
</form>
Disabled states
Add in the
disablednot-allowed<input class="form-control" id="disabledInput" type="text" placeholder="Disabled input here..." disabled>Include the
disabled<fieldset>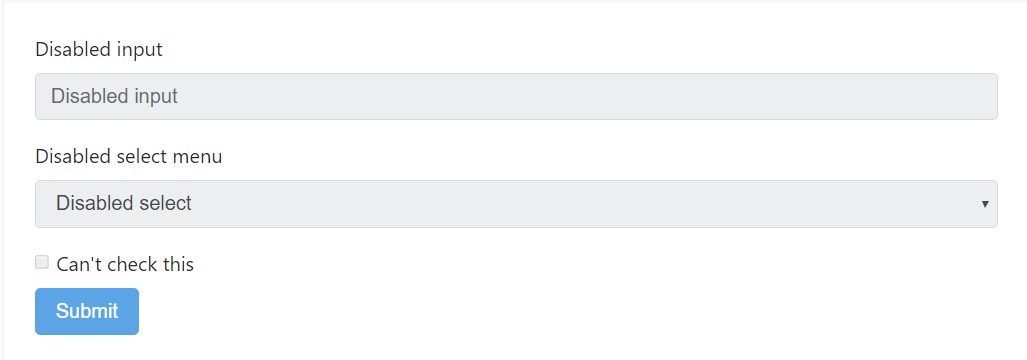
<form>
  <fieldset disabled>
    <div class="form-group">
      <label for="disabledTextInput">Disabled input</label>
      <input type="text" id="disabledTextInput" class="form-control" placeholder="Disabled input">
    </div>
    <div class="form-group">
      <label for="disabledSelect">Disabled select menu</label>
      <select id="disabledSelect" class="form-control">
        <option>Disabled select</option>
      </select>
    </div>
    <div class="checkbox">
      <label>
        <input type="checkbox"> Can't check this
      </label>
    </div>
    <button type="submit" class="btn btn-primary">Submit</button>
  </fieldset>
</form>
Caution regarding to link functionality of <a>
<a>By default, web browsers will certainly deal with all of the native form controls (
<input><select><button><fieldset disabled><a ... class="btn btn-*">pointer-events: noneCross-browser being compatible
As long as Bootstrap is going to apply these types of styles in all of the internet browsers, Internet Explorer 11 and below don't entirely support the
disabled<fieldset>Readonly inputs
Add the
readonly
<input class="form-control" type="text" placeholder="Readonly input here…" readonly>Command sizing
Put heights using classes like
.form-control-lg.col-lg-*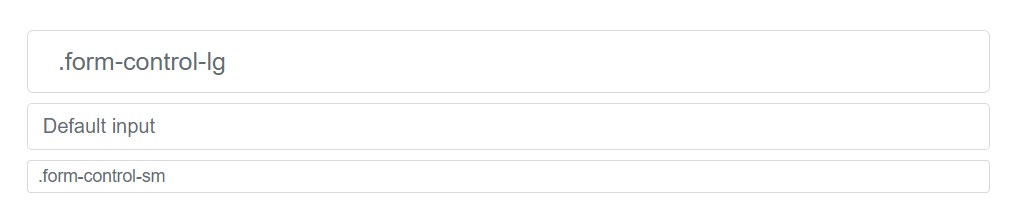
<input class="form-control form-control-lg" type="text" placeholder=".form-control-lg">
<input class="form-control" type="text" placeholder="Default input">
<input class="form-control form-control-sm" type="text" placeholder=".form-control-sm">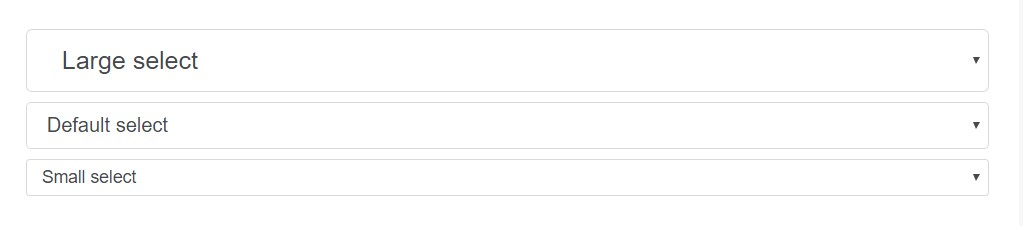
<select class="form-control form-control-lg">
  <option>Large select</option>
</select>
<select class="form-control">
  <option>Default select</option>
</select>
<select class="form-control form-control-sm">
  <option>Small select</option>
</select>
Column size
Wrap inputs in a grid columns, or any type of custom-made parent feature, in order to conveniently put in force the needed widths.

<div class="row">
  <div class="col-2">
    <input type="text" class="form-control" placeholder=".col-2">
  </div>
  <div class="col-3">
    <input type="text" class="form-control" placeholder=".col-3">
  </div>
  <div class="col-4">
    <input type="text" class="form-control" placeholder=".col-4">
  </div>
</div>
Assist content
The
.help-block.form-text.has-feedback.form-control-danger.form-control-warning.form-control-successAffiliating support text message along with form controls
Assistance text message must be clearly connected with the form control it really associates with working with the
aria-describedbyBlock level
Block support text-- for below inputs or else for a lot longer lines of the guidance text-- can be conveniently obtained with
.form-textdisplay: block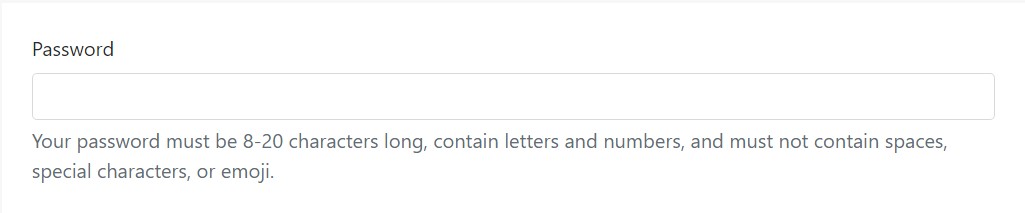
<label for="inputPassword5">Password</label>
<input type="password" id="inputPassword5" class="form-control" aria-describedby="passwordHelpBlock">
<p id="passwordHelpBlock" class="form-text text-muted">
  Your password must be 8-20 characters long, contain letters and numbers, and must not contain spaces, special characters, or emoji.
</p>
Inline
Inline words can certainly apply any kind of typical inline HTML feature (be it a 'small', 'span', or else something else).

<form class="form-inline">
  <div class="form-group">
    <label for="inputPassword4">Password</label>
    <input type="password" id="inputPassword4" class="form-control mx-sm-3" aria-describedby="passwordHelpInline">
    <small id="passwordHelpInline" class="text-muted">
      Must be 8-20 characters long.
    </small>
  </div>
</form>
Validation
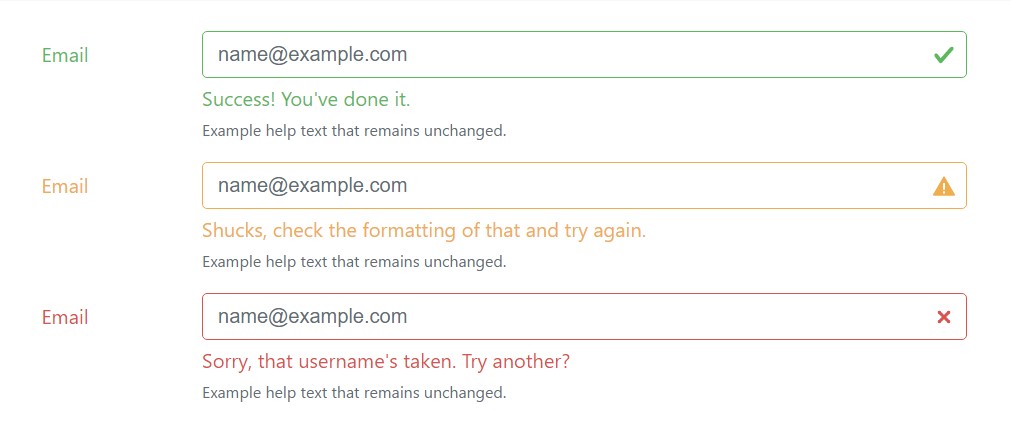
Bootstrap incorporates validation varieties for success, warning, and danger states on most form controls.
Tips on how to use
Here's a briefing of how they work:
- To employ, include
.has-warning.has-danger.has-success.col-form-label.form-control- Contextual validation text message, as well as your typical form field assistance message, can be provided together with the use of
.form-control-feedback.has-*margincolor- Validation icons are
url()background-image- You may employ your special base64 PNGs as well as SVGs simply by improving the Sass variables and recompiling.
- Icons have the ability to also be disabled completely through establishing the variables to
noneSpecifying conditions
Generally stating, you'll need to use a certain state for specific sorts of responses:
- Danger is outstanding for the moment there's a blocking or possibly requested field. A user has to write in this specific field the proper way to provide the form.
- Warning works properly for input values which are in progression, like parole strength, as well as soft validation prior to a user attempts to submit a form.
- And as a final point, success is most suitable for cases each time you have per-field validation throughout a form and also desire to encourage a user throughout the remaining fields.
Good examples
Here are some good examples of the aforementioned classes at work. First up is your usual left-aligned fields together with labels, guidance content, and validation message.
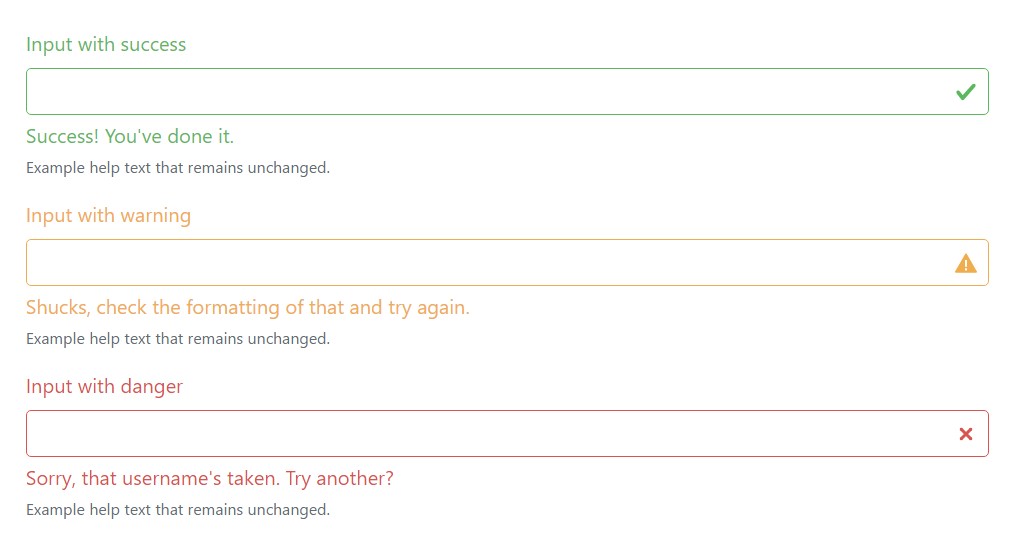
<div class="form-group has-success">
  <label class="form-control-label" for="inputSuccess1">Input with success</label>
  <input type="text" class="form-control form-control-success" id="inputSuccess1">
  <div class="form-control-feedback">Success! You've done it.</div>
  <small class="form-text text-muted">Example help text that remains unchanged.</small>
</div>
<div class="form-group has-warning">
  <label class="form-control-label" for="inputWarning1">Input with warning</label>
  <input type="text" class="form-control form-control-warning" id="inputWarning1">
  <div class="form-control-feedback">Shucks, check the formatting of that and try again.</div>
  <small class="form-text text-muted">Example help text that remains unchanged.</small>
</div>
<div class="form-group has-danger">
  <label class="form-control-label" for="inputDanger1">Input with danger</label>
  <input type="text" class="form-control form-control-danger" id="inputDanger1">
  <div class="form-control-feedback">Sorry, that username's taken. Try another?</div>
  <small class="form-text text-muted">Example help text that remains unchanged.</small>
</div>
All those similar states have the ability to also be utilized with horizontal forms.
<div class="container">
  <form>
    <div class="form-group row has-success">
      <label for="inputHorizontalSuccess" class="col-sm-2 col-form-label">Email</label>
      <div class="col-sm-10">
        <input type="email" class="form-control form-control-success" id="inputHorizontalSuccess" placeholder="name@example.com">
        <div class="form-control-feedback">Success! You've done it.</div>
        <small class="form-text text-muted">Example help text that remains unchanged.</small>
      </div>
    </div>
    <div class="form-group row has-warning">
      <label for="inputHorizontalWarning" class="col-sm-2 col-form-label">Email</label>
      <div class="col-sm-10">
        <input type="email" class="form-control form-control-warning" id="inputHorizontalWarning" placeholder="name@example.com">
        <div class="form-control-feedback">Shucks, check the formatting of that and try again.</div>
        <small class="form-text text-muted">Example help text that remains unchanged.</small>
      </div>
    </div>
    <div class="form-group row has-danger">
      <label for="inputHorizontalDnger" class="col-sm-2 col-form-label">Email</label>
      <div class="col-sm-10">
        <input type="email" class="form-control form-control-danger" id="inputHorizontalDnger" placeholder="name@example.com">
        <div class="form-control-feedback">Sorry, that username's taken. Try another?</div>
        <small class="form-text text-muted">Example help text that remains unchanged.</small>
      </div>
    </div>
  </form>
</div>
Radios and checkboxes are also assisted.

<div class="form-check has-success">
  <label class="form-check-label">
    <input type="checkbox" class="form-check-input" id="checkboxSuccess" value="option1">
    Checkbox with success
  </label>
</div>
<div class="form-check has-warning">
  <label class="form-check-label">
    <input type="checkbox" class="form-check-input" id="checkboxWarning" value="option1">
    Checkbox with warning
  </label>
</div>
<div class="form-check has-danger">
  <label class="form-check-label">
    <input type="checkbox" class="form-check-input" id="checkboxDanger" value="option1">
    Checkbox with danger
  </label>
</div>
Customized forms
For a lot more customization plus cross browser steadiness, apply Bootstrap fully custom-made form elements to replace the web browser defaults. They're built on top of attainable and semantic markup, in this way they are definitely concrete substitutes for any type of default form control.
Disabled
Custom-made radios and checkboxes have the ability to additionally be disabled . Add in the
disabled<input>
<label class="custom-control custom-checkbox">
  <input type="checkbox" class="custom-control-input" disabled>
  <span class="custom-control-indicator"></span>
  <span class="custom-control-description">Check this custom checkbox</span>
</label>

<label class="custom-control custom-radio">
  <input id="radio3" name="radioDisabled" type="radio" class="custom-control-input" disabled>
  <span class="custom-control-indicator"></span>
  <span class="custom-control-description">Toggle this custom radio</span>
</label>
Validation conditions
Put in the various other states to your custom made forms along with Bootstrap validation classes.

<div class="form-group has-success">
  <label class="custom-control custom-checkbox">
    <input type="checkbox" class="custom-control-input">
    <span class="custom-control-indicator"></span>
    <span class="custom-control-description">Check this custom checkbox</span>
  </label>
</div>
<div class="form-group has-warning">
  <label class="custom-control custom-checkbox">
    <input type="checkbox" class="custom-control-input">
    <span class="custom-control-indicator"></span>
    <span class="custom-control-description">Check this custom checkbox</span>
  </label>
</div>
<div class="form-group has-danger mb-0">
  <label class="custom-control custom-checkbox">
    <input type="checkbox" class="custom-control-input">
    <span class="custom-control-indicator"></span>
    <span class="custom-control-description">Check this custom checkbox</span>
  </label>
</div>
Stacked
Custom-made checkboxes and radios are inline to start. Put in a parent along with class
.custom-controls-stacked
<div class="custom-controls-stacked">
  <label class="custom-control custom-radio">
    <input id="radioStacked1" name="radio-stacked" type="radio" class="custom-control-input">
    <span class="custom-control-indicator"></span>
    <span class="custom-control-description">Toggle this custom radio</span>
  </label>
  <label class="custom-control custom-radio">
    <input id="radioStacked2" name="radio-stacked" type="radio" class="custom-control-input">
    <span class="custom-control-indicator"></span>
    <span class="custom-control-description">Or toggle this other custom radio</span>
  </label>
</div>
Select menu
Custom-made
<select>.custom-select
<select class="custom-select">
  <option selected>Open this select menu</option>
  <option value="1">One</option>
  <option value="2">Two</option>
  <option value="3">Three</option>
</select>
File web browser
The file input is the much gnarly of the bunch and need extra JavaScript if you want to catch them up with useful Choose file ... and selected file name text message.
<label class="custom-file">
  <input type="file" id="file" class="custom-file-input">
  <span class="custom-file-control"></span>
</label>
Here’s how to use:
- We wrap the
<input><label>- We hide the default file
<input>opacity- We utilize
: after- We employ
:before- We announce a
height<input>In shorts, it's an absolutely customized element, entirely generated with CSS.
Transposing or modifying the sequences
The
: lang()$ custom-file-textes$custom-file-text: (
placeholder: (
en: "Choose file...",
es: "Seleccionar archivo..."
),
button-label: (
en: "Browse",
es: "Navegar"
)
);You'll have to specify the language of your file ( or else subtree thereof) effectively needed for the correct message to become displayed. This may possibly be performed utilizing the lang attribute as well as the Content-Language HTTP header, amongst additional approaches.
Conclusions
Generally all of these are the brand-new capabilities to the form components included within the current fourth version of the Bootstrap framework. The entire thought is the classes got more specific and instinctive as a result-- much more convenient to use and also using the custom control features we can easily now get much more predictable visual aspect of the features we include within the web pages we create. Right now all that is actually left for us is determine the suitable info we would likely require from our possible site visitors to fill in.
Efficient ways to make use of the Bootstrap forms:
Related topics:
Bootstrap forms official records
Bootstrap information
Support for Bootstrap Forms